
Midi Options & Setup
There are a vast amount of available midi controls in VIDIFOLD. You can build your own midi mapping via the edit options. There are extensive midi input mapping options and and reasonable set of midi output mapping options.

The detected midi devices can be found in the 'Externals' tab, under Midi section.
The gold item is a custom full integration device, in this case, VIDIFOLD and a APC40mk2 which have fully synchronised interfaces.
You can toggle each device enabled state with the 'On' button and configure them by clicking on the '?' button. This will then display the Midi Mapping window.
The bottom half of the dialog has basic management of midi configuration setups and lists the currently selected configuration details.
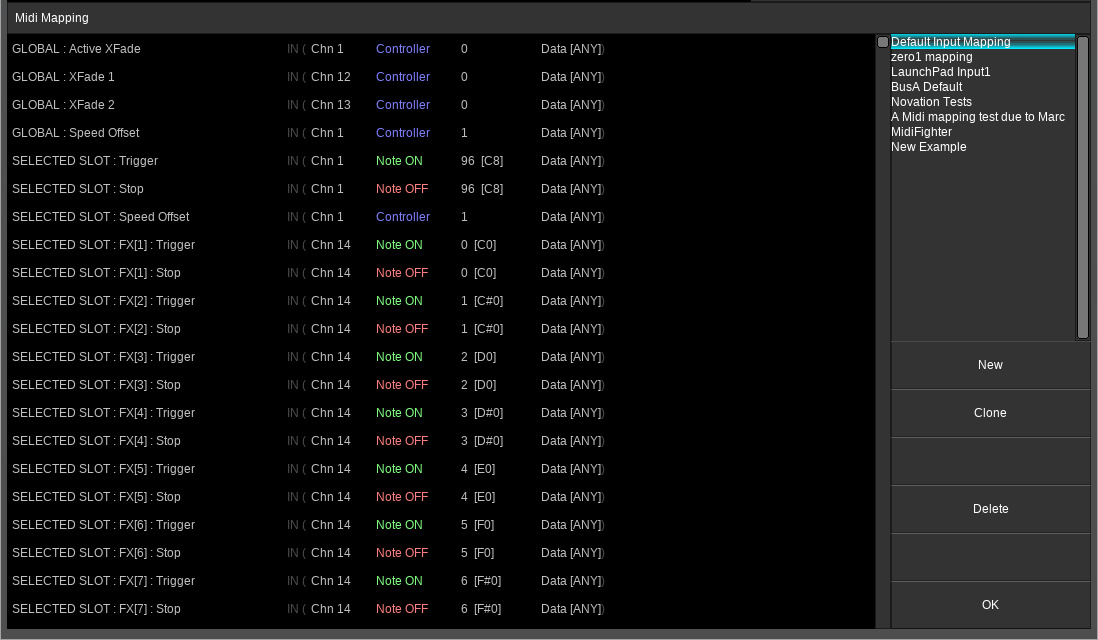
The management buttons are self explaining. Tip: When you start a new setup, make sure you have enabled the device in the previous mentioned midi section.
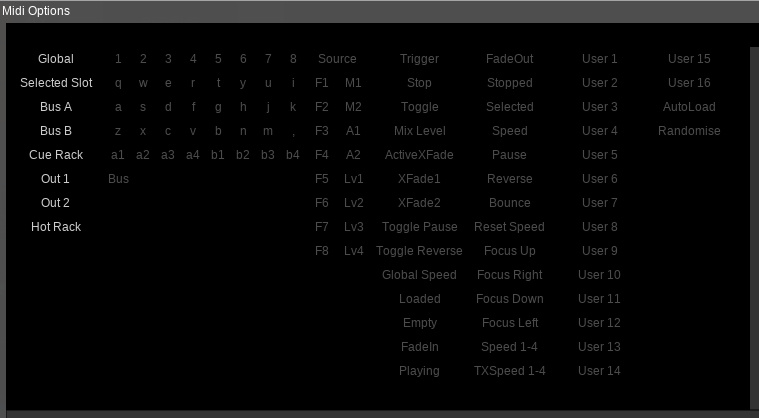
After clicking "New" and setting a name, you can then assign midi commands to any of the available actions shown in the top part of the dialog.
To aid assignments, the midi actions have been set out in a hierarchy.
For instance here's an example of how to assign a midi keyboard note to Slot 1 in Bus A using midi learn.
The list of available actions is changing/expanding as development continues.
There is a default, non-editable and updated as development requires, mapping which can reviewed via this window.
APC40 MRK2
VIDIFOLD has the ability to closely integrate with the APC40 Mk2, happens to be a midi controller I have access to. All controls have live visual feedback, changes made in the software and on the APC40 are reflected in each other. The mapping described below is for VIDIFOLD v0.38.0 and above.
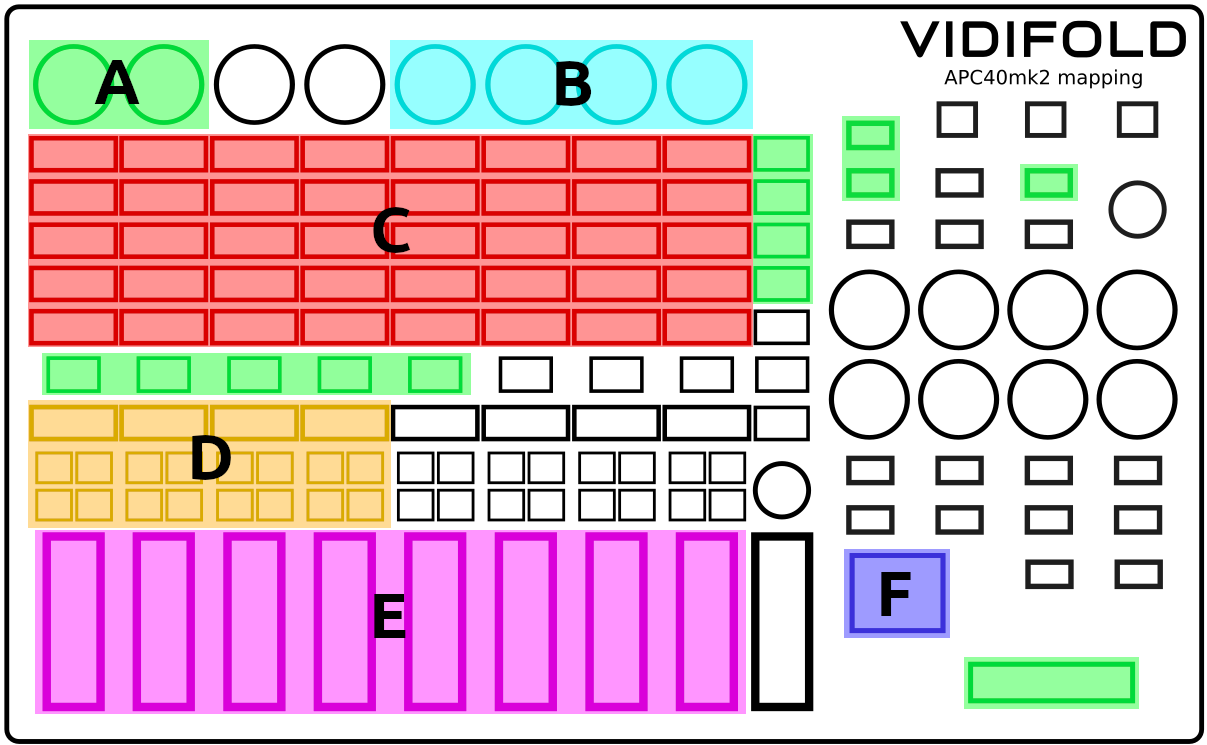
From Left to Right and working Downwards:
A: Global controls
A:1 First 2 knobs : Global Speed Offset, Global Rev
A:2 The 3 solo buttons of the right : Shift | Crtl | Beat Tap
A:3 The 4 'scene launch' buttons : Global KeyUp | A Bus Slot | B Bus Slot | Output 1 Slot
A:4 The setup lets you switch between 'Pages' for the pads.
The 5 'clip stop' buttons are the Rack Page Selection :
Page 1: A Rack
Page 2: B Rack
Page 3: Aux Rack & TXSpeed & Buses HotCues
Page 4: Current Slot FX controls
Page 5: Current Slot Live Frame Position + Slot Reverse
A:5 And finally the A-B mixer does what it says.
B: Current Macro Drivers / Controls
C: The current Page/Rack controls - see A:4
D: Tape controls
D:1 Large button lit when loop is running
D:2 Number button, and acts as rec/play button
D:3 AB button, lit when tape has content and acts as stop/clear button
D:4 S button, undo option
D:5 Rec button, lit when tape in recording state
E: Layer level faders
1-4 Bus A layer levels Top > Bottom
5-8 Bus B layer levels Top > Bottom
F: Selection Cursor Control